Menu de navegação

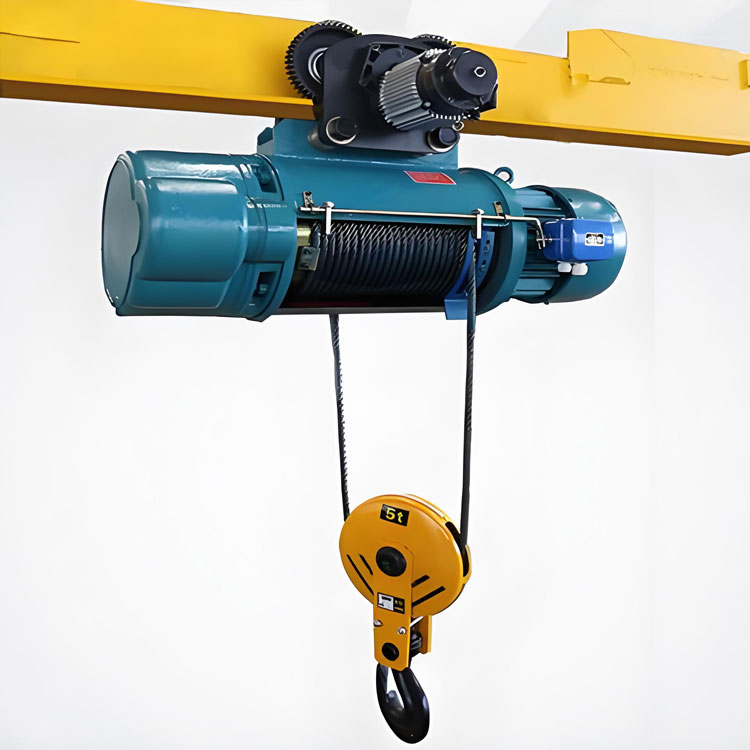
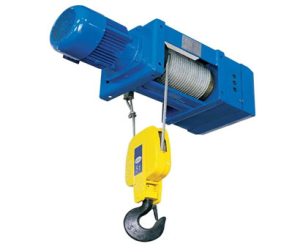
Your wire rope electric hoist is a workhorse, lifting heavy loads day in and day out. But like any critical component, the wire rope has a finite lifespan. Desgastado, kinked, or damaged rope isn't just inefficient – it's a major safety hazard. Knowing how to replace the wire rope on your electric hoist is essential for safe and reliable operation.
Chat onlineWire ropes wear out due to:
Normal Wear & Abrasion: Rubbing against drums, sheaves, and loads.
Fatigue: Repeated bending over sheaves.
Corrosion: Exposure to moisture or chemicals.
Kinking or Birdcaging: Improper handling or overload.
Broken Wires: Visible breaks indicate significant weakening.
Reduced Diameter: Wear can decrease rope diameter beyond safe limits.
Core Failure: Internal damage not always visible externally.
Ignoring worn rope risks catastrophic failure, danos materiais, e ferimentos graves. Regular inspection and timely replacement are non-negotiable.
Desconectar energia: Physically unplug or lock out/tag out (CORAÇÃO) o talha elétrica at the main power source. Verify it’s dead!
Lower Completely: Carefully lower the hook block until there’s absolutely no tension on the wire rope.
Secure the Load Block: Use a suitable sling or chain to securely support the hook block before cutting the old rope. Prevent uncontrolled falling!
PPE is Mandatory: Wear heavy-duty gloves, safety glasses, and steel-toe boots. Consider hard hats if working under the hoist.
Know Your Hoist: Consult the manufacturer’s manual! Procedures and parts (like the correct rope size, tipo, and end termination) vary significantly between wire rope electric hoist models.
Área de Trabalho: Ensure a clean, well-lit, and uncluttered space. Keep unauthorized personnel away.
Manufacturer-approved replacement wire rope (Correct diameter, construção, grade, and length)
Wire rope cutters (Bolt croppers or specialized cutters)
Heavy-duty cable ties or seizing wire
Tape measure
Marker/Paint Pen
Appropriate wrenches/sockets (for securing pins or nuts)
Manufacturer-specified socket/pin for the hook block termination
Lubricant (if recommended by manufacturer)
Rag/Shop Towels
Safety Glasses & Heavy-Duty Gloves
Hoist Manual (Essential!)
1. Secure & Identify Termination: With the hook block securely supported and no tension on the rope, locate where the rope end is fixed to the drum. This is usually under a clamp plate, held by a wedge socket, or secured with pins.
2. Release the Old Termination: Using the correct tools, carefully remove the bolts/clamp plate, wedge, or retaining pin securing the rope end to the drum. Note exactly how it was assembled.
3. Unspool Carefully: Slowly unwind the old rope from the drum. Pay attention to the direction it was spooled (clockwise or counter-clockwise) and the groove pattern. Guide it carefully to prevent kinking or uncontrolled whipping. Use cable ties to temporarily bundle sections.
4. Remove from Sheaves: Once the rope is completely off the drum, guide it out of the upper sheave(s) near the hoist body and the hook block sheave(s). Note the rope path precisely.
5. Dispose Safely: Coil the old rope securely using cable ties and dispose of it responsibly according to local regulations. Do not leave it lying around – it’s a tripping hazard and the broken wires are sharp.
1. Prepare the New Rope:
2. Attach to the Drum:
3. Route Through Sheaves:
4. Spooling Onto the Drum (Crucial Step!):
Direction is Key: The rope must spool onto the drum in the correct direction (usually indicated on the drum or in the manual). Spooling the wrong way causes immediate damage and unsafe operation.
Tension is Key: Apply firm, controlled tension to the rope as you slowly power the hoist to wind it onto the drum. You can often do this by hand-pulling down on the rope below the hook block while someone operates the “UP” control briefly and carefully. NEVER spool without tension – it will result in loose, overlapping wraps that crush and destroy the rope.
Level Winding: Ensure the rope winds evenly, side-by-side, filling the drum grooves neatly from one flange to the other. Avoid gaps or overlaps. Guide it if necessary (wear gloves!).
Spool Full Length: Wind the entire length of the new rope onto the drum until the hook block nears its highest point. Leave at least 1.5 – 2 full wraps of rope on the drum when the hook is at its lowest point (as per manufacturer spec, usually marked on the rope/drum). NEVER let the hook block reach the point where the rope termination could be pulled off the drum.
5. Secure the Load End:
Install the manufacturer-specified socket, pin, or clamp to secure the rope end to the hook block. Torque to spec.
Remove Support & Lubrificar (If Applicable): Carefully remove the sling or chain supporting the hook block. Apply recommended lubricant to the rope if specified by the manufacturer (some pre-lubed ropes don’t need it immediately).
1. Inspeção Visual: Double-check all terminations are secure, rope is correctly seated in all sheaves, and spooling on the drum is neat and even.
2. Operational Check (No Load): Reconnect power. Slowly run the hoist through its full UP and DOWN range several times. Ouça ruídos incomuns. Watch the rope spool on and off the drum smoothly and track correctly in the sheaves.
3. Light Load Test: Lift a very light load (significantly below capacity) several times. Observe operation.
4. Rated Load Test (Crítico!): Perform a test lift with a load at or near the hoist’s rated capacity. Consult your manual and safety regulations (like OSHA/ANSI or equivalent). This often requires formal documentation and specific procedures. Do NOT skip this step. It verifies the integrity of the installation under stress.
5. Final Inspection: After testing, inspect the terminations again and check the rope for any signs of unusual wear or damage from the initial runs.
Maintenance Tip: Regularly inspect your wire rope electric hoist rope according to the manufacturer’s schedule and applicable safety standards. Look for broken wires, torções, corrosão, diameter reduction, and improper spooling. Keep records of inspections and replacements.

Replacing the wire rope on your electric hoist is a vital maintenance task demanding respect, preparation, and strict adherence to safety protocols and manufacturer instructions. While this guide provides a general overview, your hoist’s specific manual is the ultimate authority. If you lack the proper tools, training, or confidence, always enlist a qualified technician. Properly installed and maintained wire rope is fundamental to the safe, eficiente, and long-lasting operation of your wire rope electric hoist. Don’t cut corners – prioritize safety above all else.
Valorizamos seu feedback! Preencha o formulário abaixo para que possamos adaptar nossos serviços às suas necessidades específicas.
12 Tonels Chain Hoist não é apenas uma ferramenta - é sua defesa da linha de frente contra o tempo de inatividade, seguro……
Principais pontos fortes & Principais características da talha elétrica suspensa 1. Robust Construction &a……

10 Principais recursos da talha elétrica Ton 1. Alta capacidade de elevação: Suporta um máximo ……
Por que escolher uma talha elétrica Weihua para remoção do motor? Hóias tradicionais do motor (cereja……

